


How to Accelerate Workflows by Connecting ClickTime and Salesforce
If you’re a time-tracking organization, you understand how getting your employees to consistently log their time can be a challenge. Managers want to do as much as possible to ensure consistent and accurate data collection. Using Zapier to connect ClickTime with Salesforce reduces the time your team spends on redundant tasks, and improves time entry consistency.
Zapier allows users to connect a variety of software products through automation without using any code! If you’d like to know more about how ClickTime and Zapier can work together, take a look at this ClickTime Zapier Guide, or learn more about the platform with Zapier's Getting Started Guide. Below, we’ll be discussing exactly how you can use ClickTime with Zapier to replicate these benefits in your own organization.
In this guide, the “Zap” (the name Zapier gives its automation processes) creates a Job in ClickTime whenever an Opportunity in Salesforce is moved past a certain stage. This helps ensure that employees who are recording time always have accurate Jobs to track time against in ClickTime. It also reduces the work required to keep both systems up to date. A win-win situation to be sure. Let’s take a look at how this is done:
What You'll Need
To start building Zaps across ClickTime and Salesforce, you’ll need the following:
- Zapier Account
- Salesforce Account
- ClickTime Account
Establish Your Company's Object Mappings
Your Salesforce-to-time-tracking setup may vary depending on each company, but you just need to find the right translation between systems, and the concept is the same. For this case, we will consider the following entity mapping between Salesforce and ClickTime:
| Salesforce | ClickTime |
|---|---|
| Account | Client |
| Opportunity | Job |
Step 1:
Create a Brand New Zap.

Step 2:
Salesforce has multiple Trigger events. For this example, we’ll want the workflow to start when an opportunity is updated. Therefore, we’ll select the following set up:
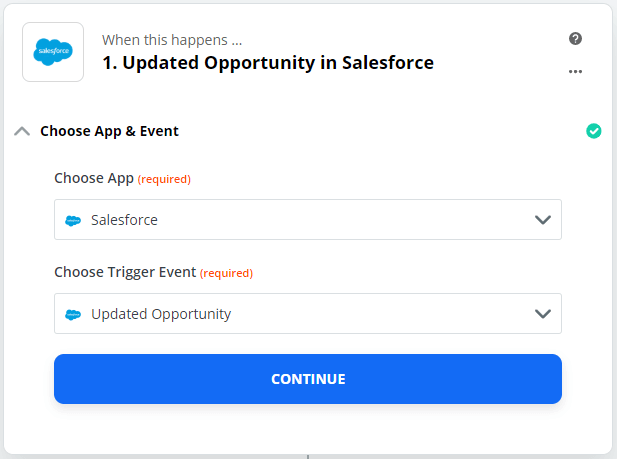
Step 3:
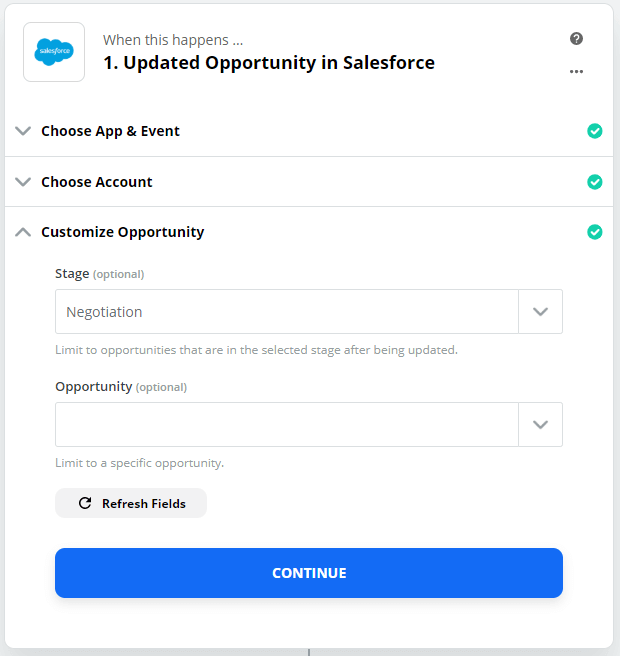
In this Zap, we’ll assume that once an opportunity reaches the Negotiation stage, it will be converted into a Job in ClickTime to track time against it.
Step 4:
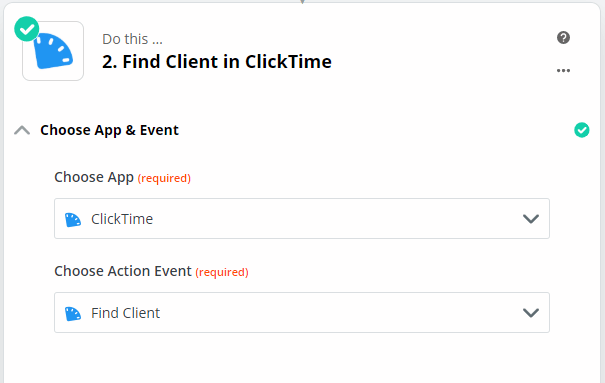
To create a Job in ClickTime, it must be associated with a Client, so we’ll look up the appropriate ClickTime Client using the Account Name associated with the Opportunity (note: Jobs in ClickTime cannot exceed 50 characters).
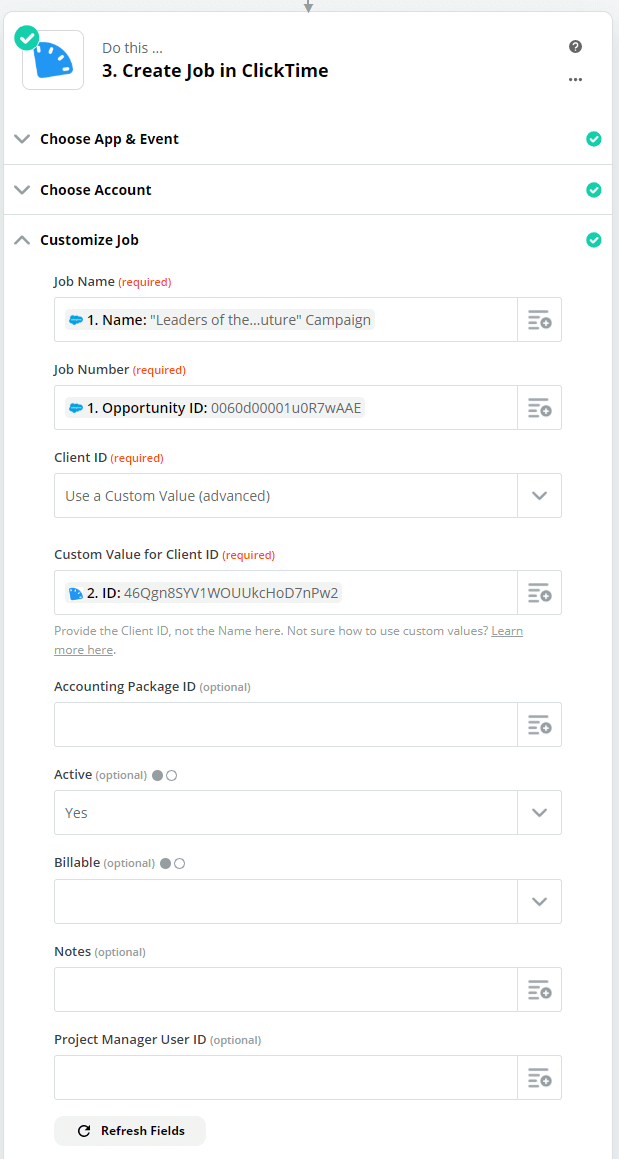
Step 5:
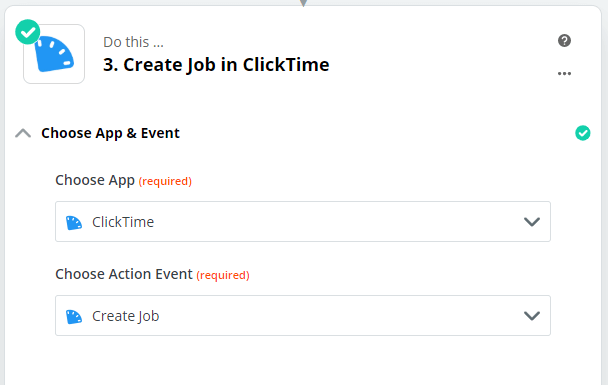
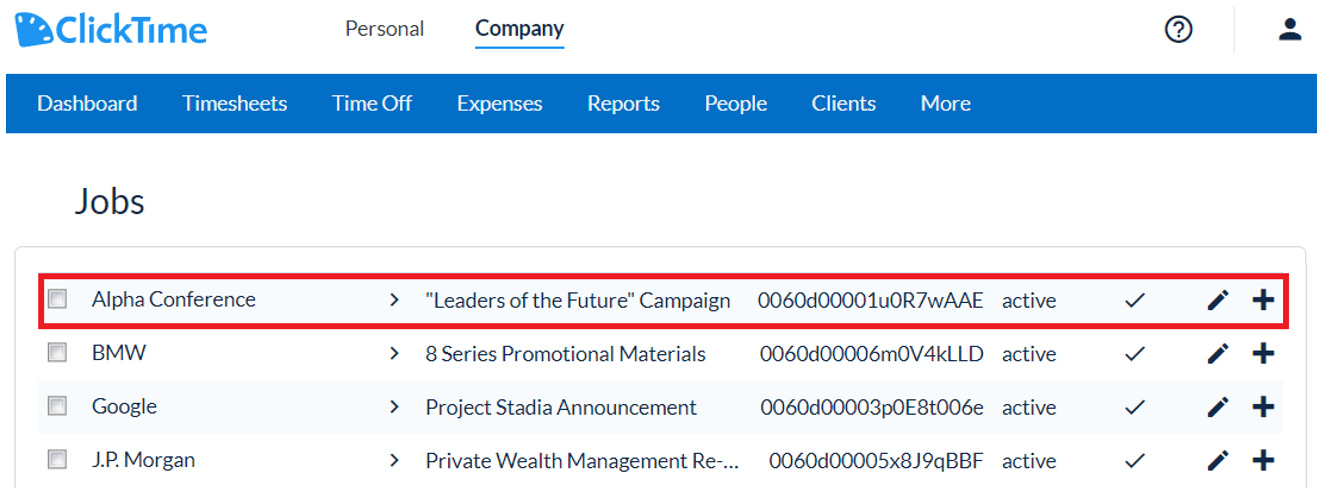
Finally, we can create the ClickTime Job using the Account Name and Opportunity ID from Salesforce and the ClickTime Client ID from the previous step:
Step 6:
Enable the Zap and enjoy the results of your hard work!
Thousands of process automations just like this can be up and running in just a few clicks. Zapier has a well-written step-by-step guide on how to start building your own Zaps: Getting Started Guide - How to Build a Zap Workflow. If you would like to take this tutorial a step further or would like to have a conversation about a custom solution for your organization, feel free to contact us -- we are always happy to help!