


So… You Want to Integrate ClickTime and BambooHR!
- Tired of manually entering employee information into both ClickTime and BambooHR?
- Wish you could automate the flow of information between the two systems?
- Want hours of your life back to concentrate on more meaningful tasks?
If you’ve been asking yourself these questions, you’ve come to the right place! At ClickTime, we understand that doing duplicate work is unnecessary, time consuming, and prone to mistakes. As a ClickTime and BambooHR administrator, you understand the importance of time management.You understand that onboarding new employees is time sensitive, and that new employees need access to systems on Day One. By connecting ClickTime & BambooHR through Zapier, you will be able to make onboarding new employees easier, increase productivity, and eliminate human error.
What is Zapier?
Zapier is cloud glue software. You can integrate your apps and automate easy workflows by simply pointing and clicking. Learn more about the Zapier platform with Zapier's Getting Started Guide.
Building your integration between BambooHR and ClickTime is as simple as 1-2-3! Before we begin, here is what you will need:
- ClickTime account
- BambooHR account
- Zapier account
Got all of the above? Let’s get started.
Step-by-Step Guide
For this guide, we will be automating the process of creating employees in ClickTime.
Figure out your field mappings
Your HR system to ClickTime integration setup will vary depending on each company, but you just need to find the right translation between systems, and the concepts are all the same. For this case, we will consider the following entity mapping between BambooHR and ClickTime:
| BambooHR | ClickTime |
|---|---|
| Display Name | User Name |
| Work Email | User Email Address |
| Job Title | Role |
| Division | Division ID |
| User ID | Accounting Package ID |
Create a Brand New Zap

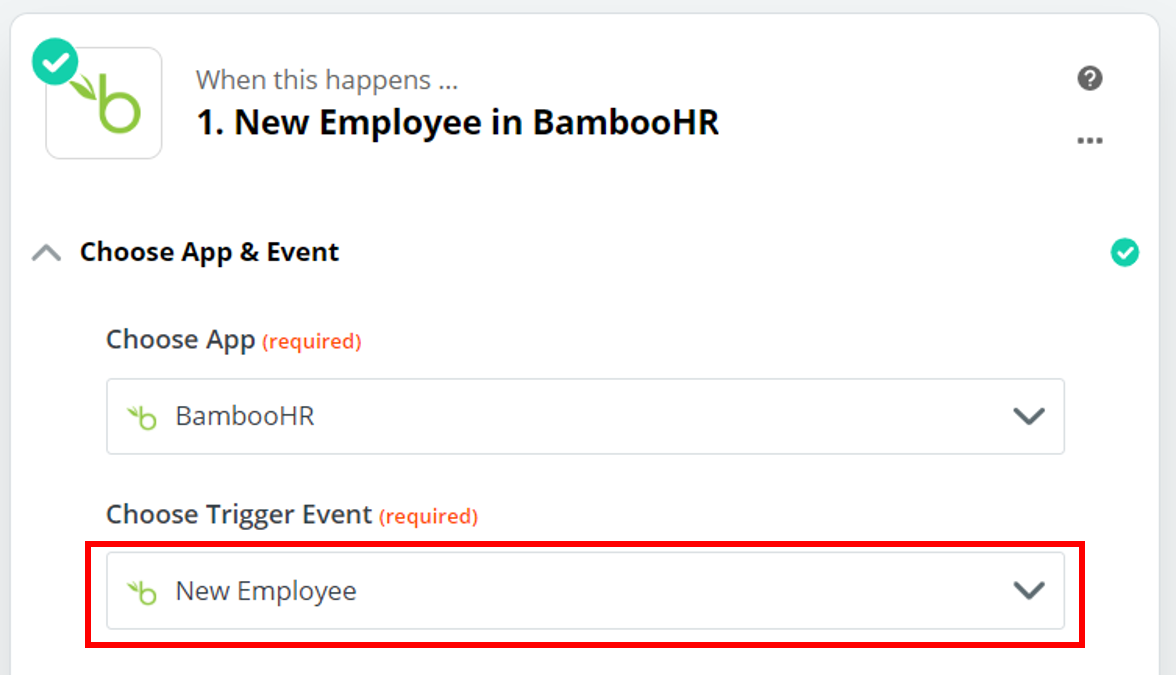
Set up your trigger App & Action (BambooHR)
- BambooHR has multiple Trigger events. For this example, we’ll assume all new employees created in BambooHR will be new ClickTime users.
(Don’t worry, we will also check ClickTime in a different step to make sure that they don’t already have an active account to avoid adding duplicate users.)
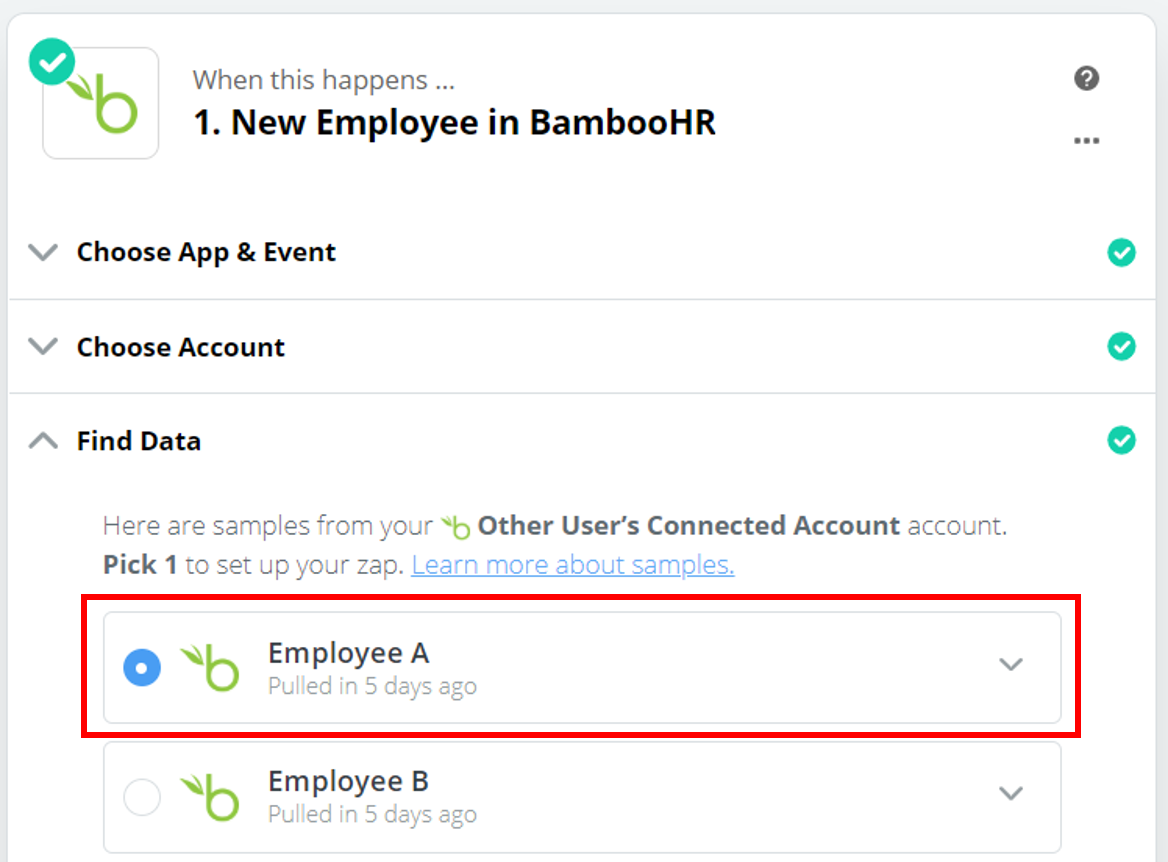
- Select the BambooHR employee you want to work with. The BambooHR employee you select is just used for mapping purposes for the Zap. You can use the down arrow next to each employee to see additional details. Once you have selected the employee that you want to use for mapping purposes, click on “Done Editing.” Remember that the BambooHR person will be equivalent to your ClickTime user.
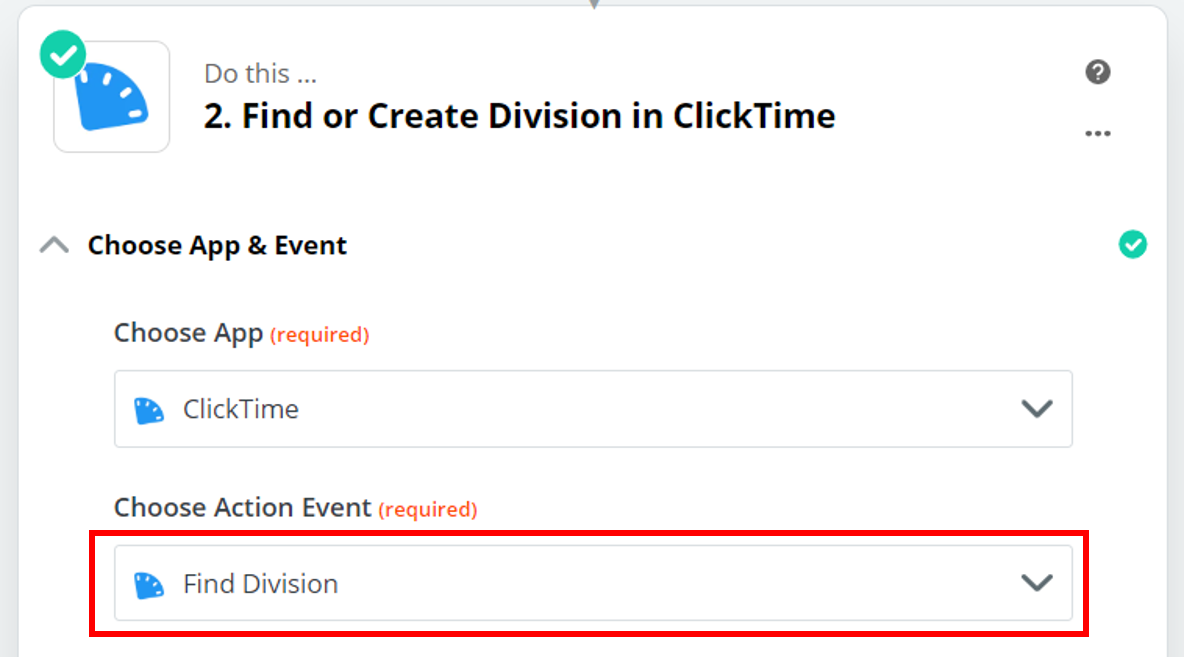
Select your Action App & Action (ClickTime)
- To create a ClickTime user, it must be associated with a Division. We strongly recommend adding a search step here for Finding the user’s Division (unless you want to hard-code a division for all users).
By adding this step, the Zap will search for the Division in ClickTime, and if the Division is not available, it will create a new Division in ClickTime. This prevents creating duplicate Divisions, and new employees will successfully be created in ClickTime if the Division is not already there!
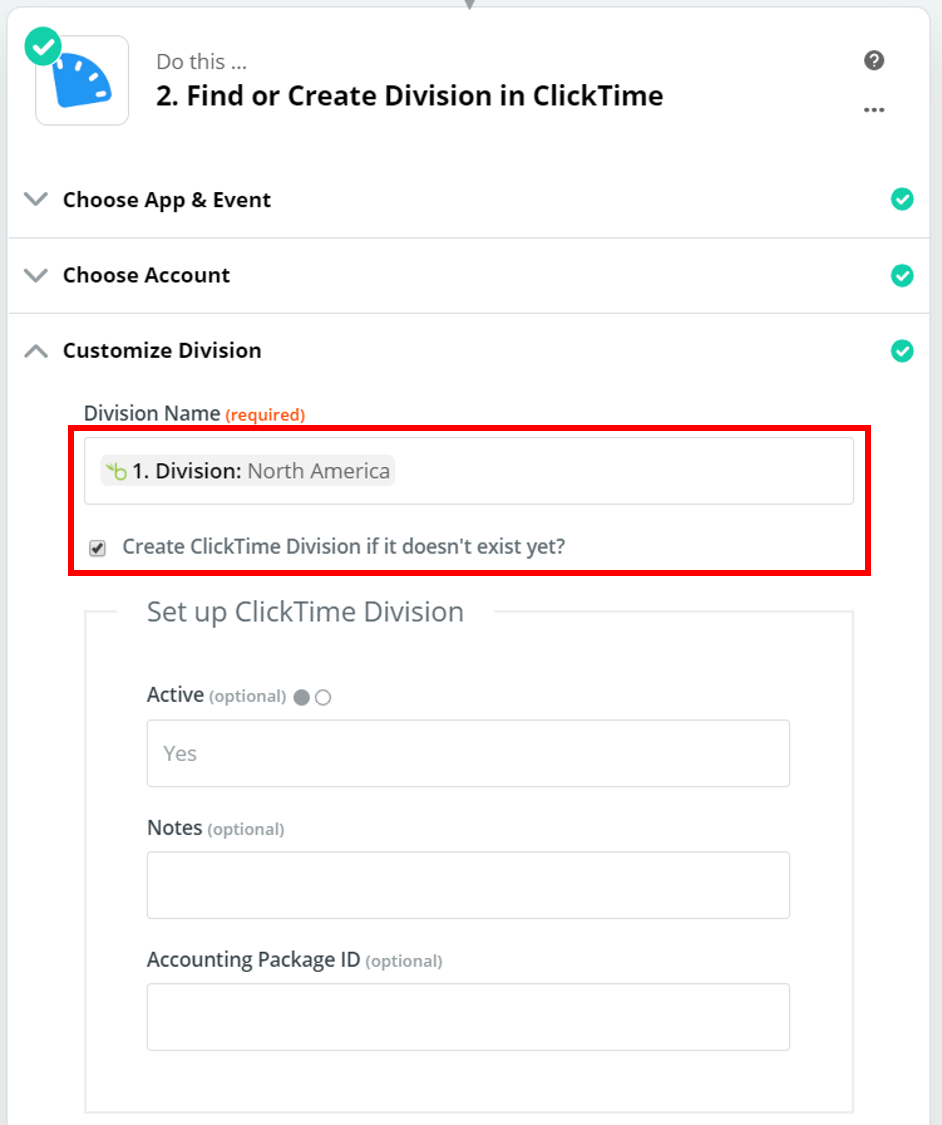
- Make sure to map the BambooHR field that you would like to use for the ClickTime Division (here we used “Division” and select the checkbox “Create ClickTime Division if it doesn’t exist yet?” to make sure all our divisions are created in ClickTime.
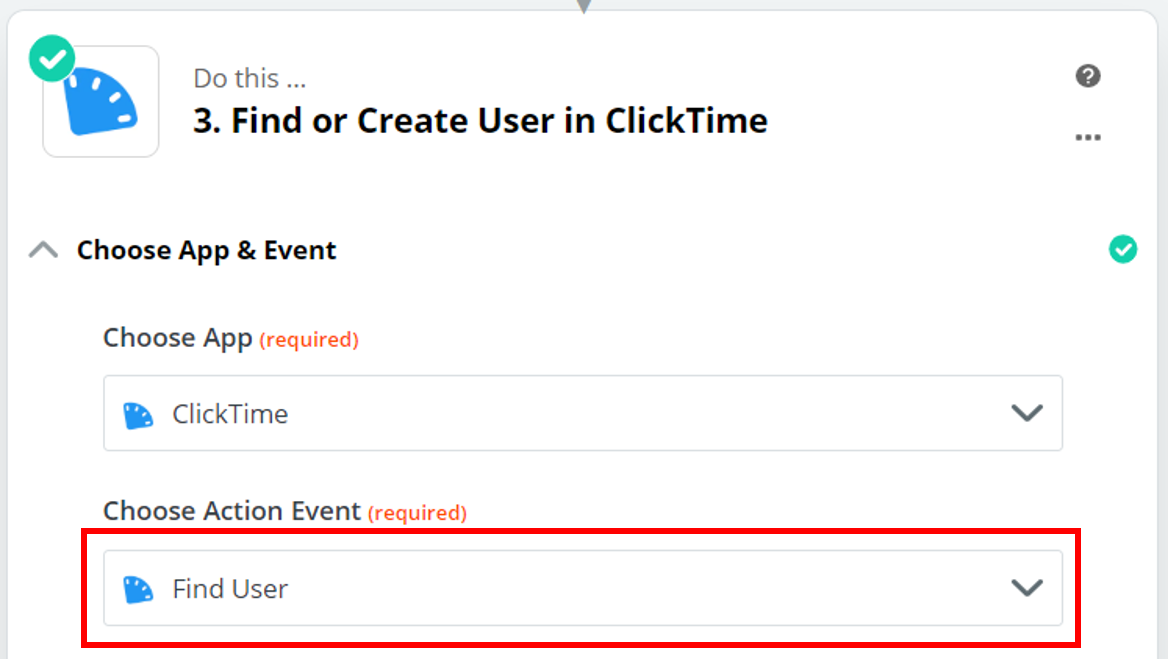
- Now we add a step to “Find or Create User in ClickTime” to finally create your user. We strongly suggest using “Find and Create” user vs “Create User in ClickTime” to avoid adding duplicate users.
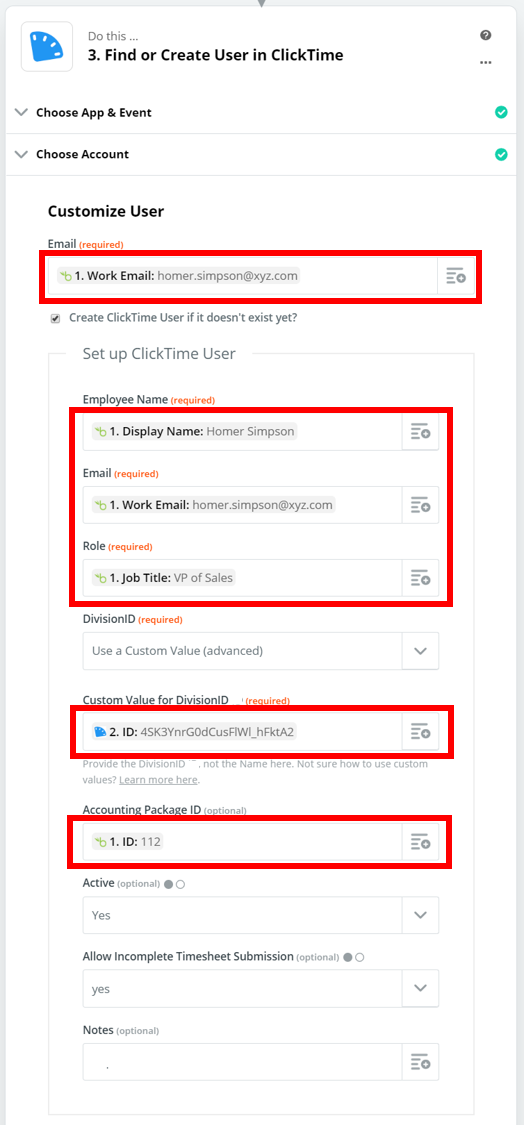
- Zapier will prompt you to map each field. Click the grey prompt next to each field to map the BambooHR fields to the ClickTime fields. You can select the Division ID from step 4 or you can hardcode a single division for all your users.
- Once all fields are mapped, hit “Test and Continue” to make certain that your Zap is working. When the test comes back successfully, you will be able to log into your ClickTime account to verify that the employee was created with the expected values.

- The last step is to turn your Zap on, and that’s it! Now every new Employee you create in BambooHR will have a corresponding ClickTime User
If you want to make your ClickTime Zapier Integration more robust, please contact us at Professional Services - we would love to help you make your ClickTime experience more awesome!